Next: 2.3 Three-dimensional meshes TRNOXX Up: 2 Visualization of meshes Prev: 3.1 Introduction Contents
![]()
![]()
![]()
![]()
![]()
![]()
![]()
![]()
Next: 2.3 Three-dimensional meshes TRNOXX
Up: 2 Visualization of meshes
Prev: 3.1 Introduction
Contents
Preprocessor TRNOXX is used to visualize meshes (the two-dimensional case is described here). In the case of an elasticity problem for which the displacements are known, we can also visualize the deformed mesh with TRNOXX (the displacements, multiplied by a given factor, are added to the nodes in the initial mesh).
 where ND is the number of degrees of freedom per node.
For other cases, preprocessor TRMCXX, requiring data structures MAIL and COOR, is used.
In practice, having input the output terminal and the file containing the mesh, we need to specify the choices made from the different possibilities offered by the module.
The module automatically calculates the extrema corresponding to the mesh treated to define the corners of the box in which the plot is displayed.
The general menu of TRNOPO (module called in this case) is shown below:
 ------------------------------------------------------------
 | 10 | PLOT TYPE                 |         MESH ONLY
 ------------------------------------------------------------
 | 11 | DEVICE NUMBER             |              1
 ------------------------------------------------------------
 | 20 | MESH TO PLOT              |         carre.nopo
 ------------------------------------------------------------
 | 31 | QUESTIONS ABOUT THIS MESH |          NO
 ------------------------------------------------------------
 | 30 | PLOT SIZE                 |         AUTO
 ------------------------------------------------------------
 | 40 | CHARACTER TYPE            |         HARD
 ------------------------------------------------------------
 | 50 | ITEMS TO BE PLOTTED       |         TRIANGULATION
 ------------------------------------------------------------
 | 60 | LEGEND                    |         YES
 ------------------------------------------------------------
 | 70 | NUMBER                    |         NONE
 ------------------------------------------------------------
 | 80 | LINE TYPE                 |         SOLID
 ------------------------------------------------------------
A default value is proposed for each option. The above table lists the automatic, or default, selections. To obtain the plot corresponding to the above status, type 0.
A key (a number) and a status corresponds to each item. To modify the status, it suffices to type the key and enter (see general introduction) the values corresponding to the status desired. The list of keys is as follows:
  -- INITIAL MESH                                 :
     NOTHING                 : 0
     TRIANGULATION           : 1
     GEOMETRIC BOUNDARY      : 2
     REFERENCED BOUNDARY     : 3
     SHRINK                  : 4  ?
The shrink operation consists of contracting, for a given ratio (0.8 by default, value modified via key 23), each element with respect to its barycentre.
    NO NUMBER          : 0
    ELEMENT : 1 - POINT : 2 - NODE : 3
    SUB-DOMAIN         : 4
    REFERENCE (ALL)    : 5
    REFERENCE POINTS   : 6 - NODES : 7
    REFERENCE EDGES    : 8
    SOLID      : 1  --   DOTTED    : 2
    DASHED     : 3  --   MIXED     : 4 ?
Once a plot has been displayed on screen, a graphics menu appears which allows us to:
Moving points, possible in dimension 2, enables us to modify the mesh by displacing certain vertices
(![]() Only the internal vertices are modifiable, in particular, the non-vertex nodes are not acceptable
for a P2 mesh.). Place the cursor in the neighborhood of the (internal) point to move and type 7,. The
point selected is highlighted (a small star appears near the point). Move the cursor to the desired position
and validate it by typing 7. The point moves and the corresponding elements are reformed (on some
terminals, the screen needs to be refreshed).
Only the internal vertices are modifiable, in particular, the non-vertex nodes are not acceptable
for a P2 mesh.). Place the cursor in the neighborhood of the (internal) point to move and type 7,. The
point selected is highlighted (a small star appears near the point). Move the cursor to the desired position
and validate it by typing 7. The point moves and the corresponding elements are reformed (on some
terminals, the screen needs to be refreshed).
The validity of the repositioning of the points is checked. It is clear that we cannot move a point in an arbitrary fashion; the program checks automatically that the mesh remains correct by calculating the surfaces of the modified elements to ensure that they remain positive.
If the point only belongs to triangles, it suffices to consider their surfaces. If the point belongs to one or several quadrilaterals, the check consists of examining the surfaces of the triangles which could be formed from the 4 vertices of each modified quadrilateral.
Figure 2.1: Checking the displacement of a point
At each modification, the coordinates of the initial and final point positions are displayed. Thus, the move option can be used craftily to establish a vertex position. Place the cursor close to the desired point, validate by typing 7 and then move the point to an obviously impossible position (and validate by 7): the displacement is refused and the position of the desired point is displayed!
The module (see limits of utilization) enables us to visualize a mesh and its deformed state. The deformed mesh is obtained by adding (with an amplification factor) the displacements to the nodal coordinates.
For those cases possible, selecting key 10 results in the following general menu:
 ---------------------------------------------------------------
 | 10 | PLOT TYPE                 |         MESH AND DEFORMATION
 ---------------------------------------------------------------
 ...
 ---------------------------------------------------------------
 | 20 | MESH TO PLOT              |         carre.nopo
 ---------------------------------------------------------------
 | 21 | S.D. B USED               |         carre.b
 ---------------------------------------------------------------
 | 22 | DEFORMATION RATIO         |            100.0000
 ---------------------------------------------------------------
 | 24 | LOAD CASE                 |              1
 ---------------------------------------------------------------
 ...
 ---------------------------------------------------------------
 | 50 | ITEMS TO BE PLOTTED       |         MESH
 ---------------------------------------------------------------
 | 50 | ITEMS PLOTTED (DEFORM)    |         NO MESH
 ---------------------------------------------------------------
 ...
 ---------------------------------------------------------------
 | 80 | LINE TYPE                 |         SOLID
 ---------------------------------------------------------------
A key (number) and a status corresponds to each item (see, in particular, the new keys marked with an asterisk). To modify the status, type the key and enter (see general introduction) the values corresponding to the desired status.
Once the plot is displayed on the screen, the graphics menu described above is at our disposal (except the move option).
The plots were obtained by typing the following sequence:

Figure 2.2: Example TRNOXX 2D: automatic mode
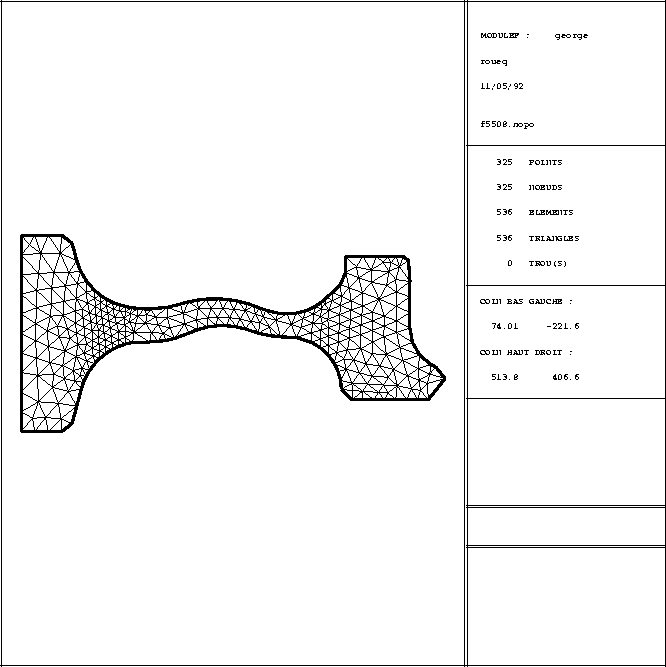
Figure 2.3: Example TRNOXX 2D: automatic mode
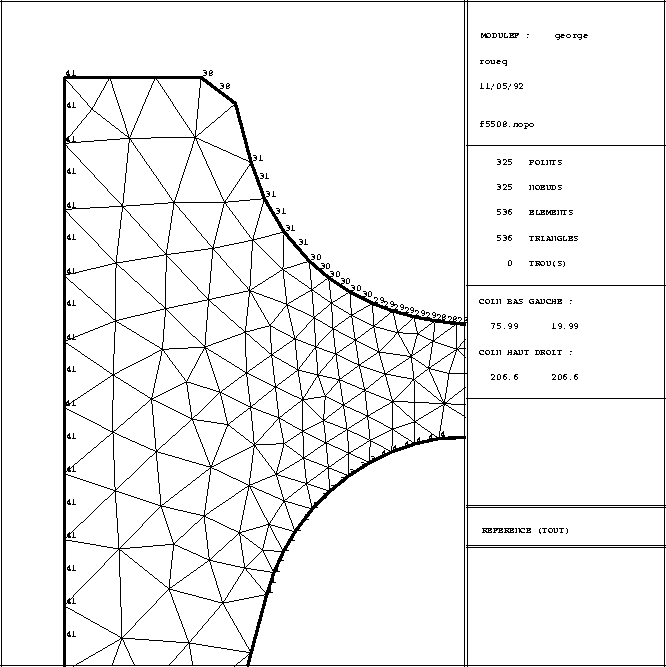
Figure 2.4: Example TRNOXX 2D: zoom, shrink and reference numbers
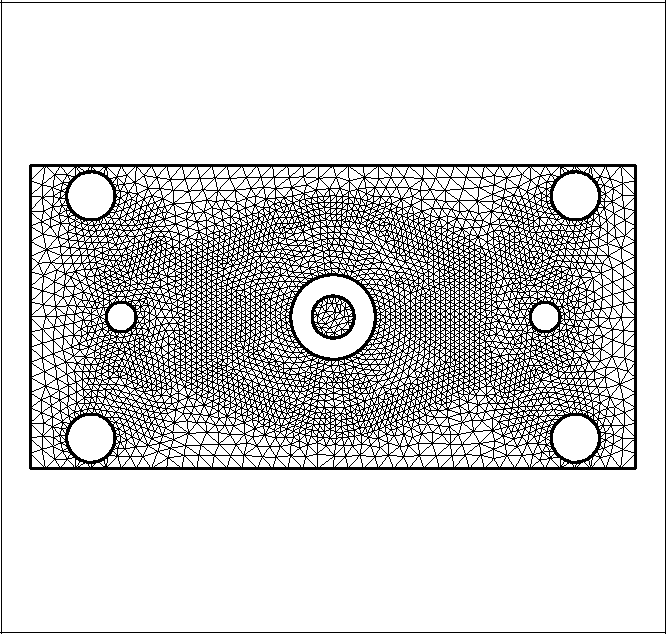
Figure 2.5: Example TRNOXX 2D: automatic mode without legend