Next: 1.5.2 The global menus Up: The EMC˛ preprocessor Prev: The EMC˛ preprocessor Index Contents
![]()
![]()
![]()
![]()
![]()
![]()
![]()
![]()
![]()
Next: 1.5.2 The global menus
Up: The EMC˛
preprocessor
Prev: The EMC˛
preprocessor
Index
Contents
The program is divided into three main, mutually exclusive, applications :
In each of the applications, we can also have access to the following menus:
 ...
...
Each main application has a specific menu of its own. All applications are driven by LL1 grammars.
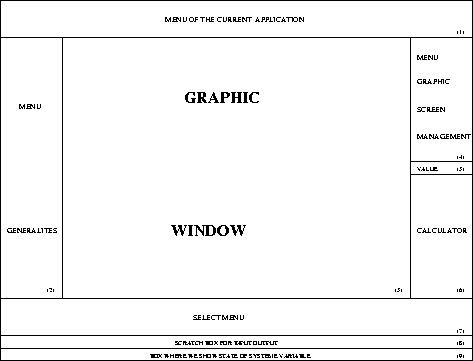
Figure 1.9: Depiction of the screen
The screen (figure 1.9) is divided into 9 zones: 5 are menus ((1), (2), (4), (7), (6)), 3 are display zones ((8), (9), (5)) , the center zone is for graphics.
The GENERAL, CALCULATOR, SCREEN MANAGEMENT menus are fixed and application independent. The APPLICATION and SELECT menus obviously depend on the current application.
The program is interactive, all entries are made with the mouse and keyboard. The mouse is used to select menu ITEMS, as well as graphic elements. Graphic elements can only be selected after the desired type of element has been chosen in the SELECT menu. The keyboard is used to enter text, for example file names, as well as short cuts (ITEMS of certain menus have keyboard equivalents).
This application is used to define the geometric contours of the domain with the help of points, segments, arcs of circles and splines. Additionally, two other construction entities are useful in certain cases: straight lines and circles. These last two entities are only used in the CONSTRUCTION application.
All these entities, except splines, can be constructed by using elementary geometry theorems. When there are multiple solutions, ambiguities are removed by using the following heuristic method: the selected points are close to the points of tangency of the elements (point, line, circle, arc, segment).
A spline is a  -curve passing through a series of points. It is closed if
the first and last points coincide.
-curve passing through a series of points. It is closed if
the first and last points coincide.
All these entities can be duplicated by using the following affine transformations: symmetry, rotation, homothety, translation.
Moreover, it is possible to:
At this point the connex components of the boundaries of the
subdomains of  are known.
We will call these connex components simply components.
are known.
We will call these connex components simply components.
This application is used to define the discretization of the entities defining the boundaries of the domain and subdomains (boundary of materials). It is also used to define the reference numbers of the subdomains, lines and points, with the aim of entering various physical data, for example, several boundary conditions, several materials.
This application is also used to create a data file so as to interface with the MODULEF mesh generator APNOXX, by defining the subdomains as a list of components where the first component is the exterior component---the other components being the components of the holes---plus internal lines and internal points to be enforced.
When moving to this application, it is possible to modify the default value of certain parameters of the mesh generator. The program constructs a triangular or grid quadrangular mesh of the subdomains defined in the previous step, or of all subdomains if none has been defined.
At the point, we can edit the mesh by:
internal structure;
the MODULEF NOPO structure;
a simplified structure and so on
 or
or
 finite element matrices.
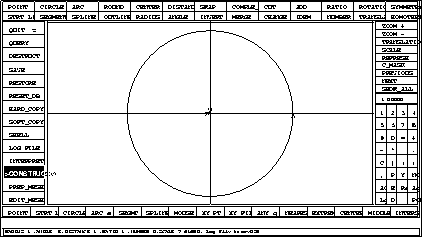
For a change, we are going to mesh a unit circle instead of a square. First, we
must construct the circle, i.e. a  arc, then define the discretization
of the arc and finally construct the mesh. These three phases correspond
respectively to the three applications CONSTRUCTION, PREP_MESH and
EDIT_MESH. Here is the list of steps to be taken.
arc, then define the discretization
of the arc and finally construct the mesh. These three phases correspond
respectively to the three applications CONSTRUCTION, PREP_MESH and
EDIT_MESH. Here is the list of steps to be taken.
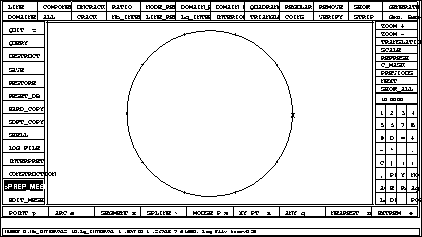
Figure 1.11: The discretized unit circle
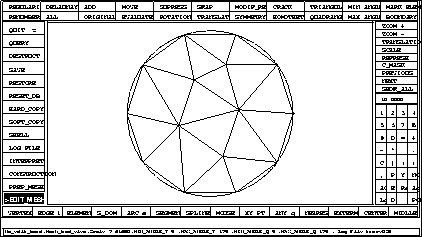
Figure 1.12: The meshed unit circle
arc of circle centered at (0,0) with a radius of 1
is displayed. Note: although the angle state variable is equal to 0, the
angle of the arc is actually
(  ).
).
To define the number of points in the arc:
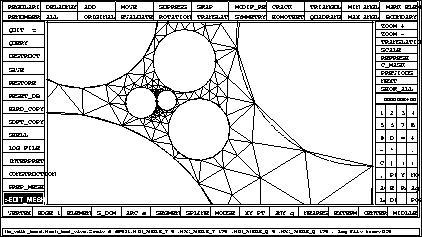
Construction of a mesh between 8 circles tangent to the 3 dotted circles (cf. figure 1.13). The arcs are divided in the neighborhood of the points of ``near tangency" for future mesh refinement. The different stages are shown in figures 1.13,1.14 and 1.15 and enlargements of the mesh in figures 1.16 and 1.17. Figure 1.17 shows a very strong zoom (around 360 times) around a point of near tangency.
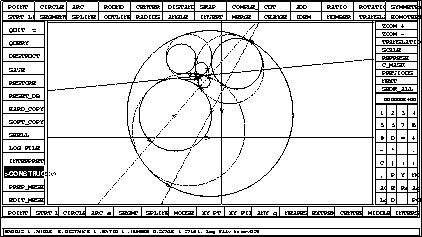
Figure 1.13: The geometry of the domain
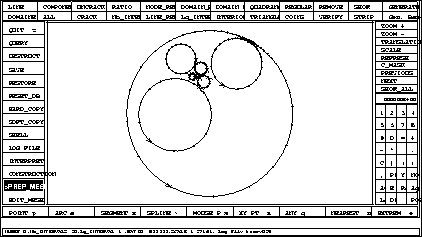
Figure 1.14: The discretization of contours
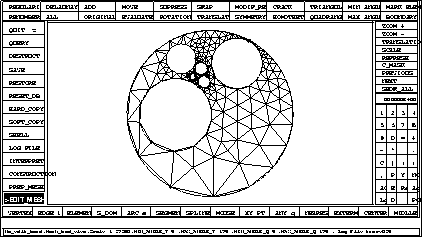
Figure 1.15: Display of the whole mesh
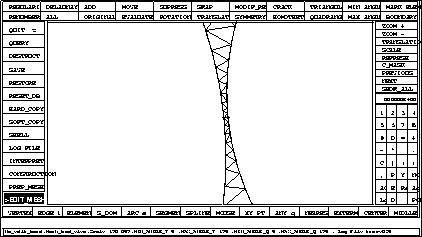
Figure 1.17: Zoom around one of the points of near tangency