Next: 1.5.3 The construction application Up: The EMC˛ preprocessor Prev: 1.5.1 General remarks Index Contents
![]()
![]()
![]()
![]()
![]()
![]()
![]()
![]()
![]()
Next: 1.5.3 The construction application
Up: The EMC˛
preprocessor
Prev: 1.5.1 General remarks
Index
Contents
Using the menus the user creates, edits, destructs and so on objects stored in two databases (DB), one for the geometry and the other for meshes.
These menus, shown at the bottom of the graphics window, make it possible to select the type of graphics selection we want (a point, a straight line, etc.). They depend on the application currently being used (cf. figures 1.18, 1.19, 1.20). It is absolutely essential to understand the outputs of these menus because all the rest depends on their functioning. All these outputs, for example, a circle, a number or the extremity of an arc, are marked (?) and the marks (or types ?) define the selection syntactical entities known by the grammars which manage the three applications.

Figure 1.18: The select menu for the CONSTRUCTION application

Figure: The select menu for the PREP_MESH application

Figure: The select menu for the EDIT_MESH application
The constructible types are :
These menus depend on the application being used as they define the type of element to be selected. The menu ITEMs (their keyboard shortcut is in parenthesis) can be classified in several categories.
SPLINE (~)
are used to select the element of the DB
closest to the clicked point, the type of selection
depends on the kind of element found and by the item in categories
(4), (5) that is used. If there is an incompatibility,
the item in category (4) is forced to change to(?) NEAREST.
 n)item is used to
effectively select an element of the DB and the type of selection is that of
the element.
n)item is used to
effectively select an element of the DB and the type of selection is that of
the element.
e),
CENTER ( c),
MIDDLE (
m) items are used to define what
we are going to select in the element of the DB (cf. (1) and (3)), i.e., we
select the point (selection type COORD) that is respectively the
extremity, the center or the middle of the selected DB element, if this makes
sense. Otherwise, the main mode of selection is forced to change to ANY, cf.
3. while keeping the item in category 5.
c),
MIDDLE (
m) items are used to define what
we are going to select in the element of the DB (cf. (1) and (3)), i.e., we
select the point (selection type COORD) that is respectively the
extremity, the center or the middle of the selected DB element, if this makes
sense. Otherwise, the main mode of selection is forced to change to ANY, cf.
3. while keeping the item in category 5.
Important note: In effect, the selection only becomes effective after we have clicked on an element in the graphic window. It is possible to click in the menu items as many times as we want so as to obtain a combination of marked items. A selection defines the type of selection and it preserves the cursor coordinates at the instant of the click. These coordinates are often useful for the application being used to remove semantic ambiguities or choose between multiple solutions to the problem being treated. For example,
If we try to select something that does not exist, we get the message you have selected nothing, which has no effect whatsoever.
The selections possible depend on the application since all types of selection are not always needed. For example, circles and straight lines are only used in the CONSTRUCTION application, elements, edges, vertices and subdomains only exist in the EDIT_MESH application.
Keyboard shortcuts that correspond to ITEMs of categories 1,2,3,4,7 are equivalent to 2 clicks, the first in the ITEM box and the following on the cursor point if it is in the graphic window. Thus the mode of selection has now changed and it is the element closest to the cursor which is selected.
An element is selected by clicking next to it (the program searches for the
element closest to the click). When we click a menu, it is marked with a >
sign in front of the text of the menu. In the selection menus, two boxes can
be marked at the same time according to the following combinations:
item (shortcut) ( possible combinations)
ANY (q) ( NEAREST, EXTREMITY, CENTER, MIDDLE )
POINT (p) ( NEAREST)
STRT LINE (l) ( NEAREST)
CIRCLE (c) ( NEAREST, CENTER )
ARC (a) ( NEAREST, EXTREMITY, CENTER, MIDDLE )
SEGMENT (s) ( NEAREST, EXTREMITY, MIDDLE )
SPLINE ( ~) ( NEAREST, EXTREMITY )
MOUSE P (m) ( NEAREST)
XY POINT (x) ( NEAREST)
VERTEX (v) ( NEAREST)
EDGE (d) ( NEAREST)
ELEMENT (f) ( NEAREST)
S_DOM (r) ( NEAREST)
Other combinations are not valid. A selection is not effective except when an element on the screen has been clicked. In fact the boxes may be clicked as many times as necessary to obtain the desired combination.
This menu (cf. figure 1.21) can also be considered as a selection menu. It can be used to define a numerical value which is of type <VALUE> .
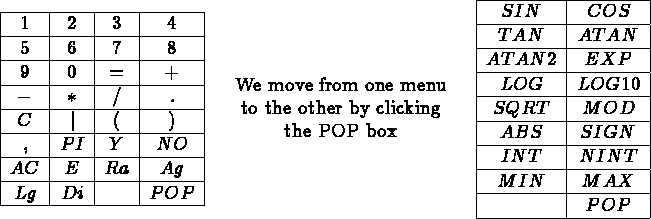
Figure 1.21: The two calculator menus
We can write any FORTRAN expression. The effective computation is achieved by clicking on the = box (shortcut =) or by typing (CR) .
The ITEMs with their keyboard shorcut between parentheses are:
Examples: to enter
 circle radius
This menu (cf. figure 1.22) is used to perform general operations: move between CONSTRUCTION, PREP_MESH and EDIT_MESH, save, restore, screen copy or execute a system command. To initiate an operation, click in the corresponding item.
The operations of the general menu are:
QUIT
Terminates the execution of the program.
QUERY
Queries the selected elements. Their characteristics are displayed in the input-output or scratch zone.
DESTRUCT
Only available in the CONSTRUCTION application. Destructs selected elements of the database. Warning: if we destruct a POINT, the program checks if this POINT is used to define a SPLINE. If this is the case, it is also removed from the SPLINE.
SAVE
Saves the DB in a file. The name of the file is composed a prefix and a suffix. The system asks for the prefix in the scratch zone (figure 1.9). According to the case, the suffix can be .emc2_bd, .mesh, .nopo, .am, .am_fmt, .amdba and it depends on the current application:
RESTORE
Restores the DB of a file. The name of the file is composed of a prefix and a suffix. The system asks for the prefix in the scratch zone (figure 1.9). According to the case, the suffix can be .emc2_bd, .mesh, .nopo, .am, .am_fmt, .amdba. The data restored depend on the current application.
Caution: The recently read mesh is not merged with already existing meshes.
DB_RESET
Clears everything stored in the 2 databases.
HARD_COPY
Makes a bitmap, screen resolution, hard copy of the screen. Depends on the system and on the environment (cf. hardcp subroutine).
SOFT_COPY
Displays the screen on another Fortran 3d peripheral device. Depends on the system and on the environment (cf. softcp subroutine)
SHELL
Executes a system command (shell). The system asks for the the command(s) in a character string. Depends on the system (cf. exec subroutine).
LOG FILE
Saves all user operations in a file. The file name is composed of prefix given by the user and the suffix .trace_emc2. If the prefix starts with a + sign, it is appended to the trace file. A default trace file is open. Its prefix is tracexxxx, where xxxx is a version number in order not to erase the previous trace.
INTERPRET
Interprets a trace file. The prefix is given by the user.
CONSTRUCTION
Moves to the CONSTRUCTION application. After the move, the selection mode is MOUSE P.
PREP_MESH
Moves to the PREP_MESH application. After the move, the selection mode is MOUSE P.
EDIT_MESH
Moves to the EDIT_MESH application. When the move occurs and after the 4 questions have been answered, the program triangulates all the defined domains. If no domain has been defined, everything is meshed. The triangulation depends on 4 parameters. To get the default value, type (CR)
for each parameter.
 . coef = .75 is the default
value.
. coef = .75 is the default
value.
The screen management menu is shown in figure 1.23. It is present in all applications. It is used to handle the display of both databases. The display context consists in storing a display mask . This mask is a rectangle in subject space, computed so as to preserve the same scales in X and Y. The display context stack is in fact an 8 level circular stack. It is initialized as: scale 1, mask centered at the origin.

Figure 1.23: The screen management menu
The operations of the screen management menu are:
The rectangle defined by the two COORD is displayed full screen. The new display context is stacked in the display stack. In general, we click two times to define two opposite corners of the rectangle.
The contents of the full screen is displayed in the rectangle defined by the two COORD. The new display context is stacked in the display stack.
Translates the graphic window by vector going from the first COORD to the second COORD. The new display context is stacked in the display stack.
Changes the display scale without moving the center of the window. The new display context is stacked in the display stack.
Redraws the current display. This operation is very useful to erase unwanted residues that are often present.
Centers the window on the selected point COORD. The new display context is stacked in the display stack.
Goes down one level in the display context stack. The previous display context is restored.
Note: this context always exists because all eight levels are initialized by default.
Goes up one level in the display context stack. The next display context is used, see note above.
Computes the mask so as to show the whole database and displays it full screen.

