Next: 5 Visualization of surfaces Up: 4 Visualization of curves Prev: 4.2 Utilization of TRACXX Contents
![]()
![]()
![]()
![]()
![]()
![]()
![]()
![]()
Next: 5 Visualization of surfaces
Up: 4 Visualization of curves
Prev: 4.2 Utilization of TRACXX
Contents
The module computes the extrema corresponding to the curves to be plotted automatically so that the corners of the box in which the plot will be displayed can be defined.
The line type or symbol used to plot a curve is chosen automatically by alternating (modulo the number of possibilities which exist) the choice corresponding to the type retained.
In practice, we use preprocessor TRACXX, to indicate to the module the different choices made of the possibilities offered. The only point which is a bit delicate is the one linked to the definition of the axis appearing on the plot.
The menu of TRAKOU (module called in this case) consists of a general part, a part related to the definition of the axis, a part related to the definition of the analytical functions, and a part related to the definition of an interpolation.
A default value is proposed for each option. To modify it, it suffices to select the number of the corresponding key and enter the value(s) desired.
 ------------------------------------------------------------
 | 11 | DEVICE NUMBER             |       1
 ------------------------------------------------------------
 | 12 | PLOT TITLE                |
 ------------------------------------------------------------
 | 13 | SOLID LINE                |       0
 ------------------------------------------------------------
 | 18 | ANALYTICAL FUNCTION       |   NO
 ------------------------------------------------------------
 | 19 | INTERPOLATION             |   NO
 ------------------------------------------------------------
 | 20 | FILE TO PLOT              |  courbe1.data
 ------------------------------------------------------------
 |    | CURVES'S EXTREMA IN X     |     1.000000       20.00000
 ------------------------------------------------------------
 | 21 | EXTREMA FOR THE X'AXIS    |     1.000000       20.00000
 ------------------------------------------------------------
 |    | CURVES'S EXTREMA IN Y     |    0.0000000       50.00000
 ------------------------------------------------------------
 | 21 | EXTREMA FOR THE Y'AXIS    |    0.0000000       50.00000
 ------------------------------------------------------------
 | 22 | X'S SCALE                 |   LINEAR
 ------------------------------------------------------------
 | 22 | Y SCALE                   |   LINEAR
 ------------------------------------------------------------
 | 30 | PLOT SIZE                 |   AUTO
 ------------------------------------------------------------
 | 40 | CHARACTERS TYPE           |   HARD
 ------------------------------------------------------------
 | 60 | GENERAL LEGEND            |   YES
 ------------------------------------------------------------
 | 61 | AXES WITH LEGEND          |   NO
 ------------------------------------------------------------
 | 62 | AXES DEFINITION           |   AUTO
 ------------------------------------------------------------
 | 63 | CURVE(S) WITH LEGEND      |   NO
 ------------------------------------------------------------
 | 64 | GRID                      |   NO
 ------------------------------------------------------------
        | 80 | PLOT OF CURVE  1       BY LINES
 ------------------------------------------------------------
        | 80 | PLOT OF CURVE  2       BY LINES
 ------------------------------------------------------------
 | 81 | CURVE GRAPHICS            |   AUTO
 ------------------------------------------------------------
 | 82 | LINE THICKNESS            |       1
 ------------------------------------------------------------
 | 83 | HELP (LINE, GRAPHICS)     |
 ------------------------------------------------------------
 | 90 | SAVE CURVES               |   NON
 ------------------------------------------------------------
A key (a number) and a status correspond to each item. To modify the status, it suffices to type the key and enter the values corresponding to the status desired (see the general introduction).
The user activates key 62 to define the axes him/herself. For example, for the x-axis the following menu appears (an identical menu is obtained, directly after, for the y-axis):
-------------------------------------------------------------
 ---   DEFINITION FOR THE X AXIS :
-------------------------------------------------------------
 | 10 | SCALE                     |   LINEAR
 ------------------------------------------------------------
 | 11 | LEGEND ON THE 2 AXES      |  NO
 ------------------------------------------------------------
 | 12 | DEFINITION GRADUATIONS    |   AUTOMATIC CUT
 ------------------------------------------------------------
 | 13 | NUMBER OF INTERVALS       |       3
 ------------------------------------------------------------
 | 14 | NUMBER OF SUB-INTERVALS   |       5
 ------------------------------------------------------------
 | 16 | FORMAT OF VALUES          |  F*.     1
 ------------------------------------------------------------
 | 17 | SIZE FACTOR      (X)      |     1.000000
 ------------------------------------------------------------
 | 18 | SIZE FACTOR      (Y)      |     1.000000
 ------------------------------------------------------------
 | 20 | RETURN TO AUTOMATIC MODE  |  NO
 ------------------------------------------------------------
An axis is defined by the following parameters:
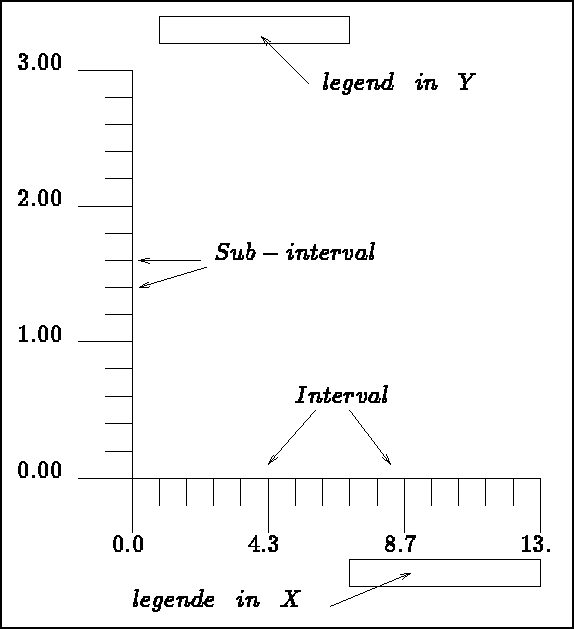
Figure 4.1: Automatic division of the x and y axes
These choices are made via the keys described below:
Activate key 18 to define a non-singular function on an interval (if the function is singular, the singular points must be eliminated). The following menu is obtained:
 -- TRACE D'UNE FONCTION DONNEE AU CLAVIER --
 ** CURVES'S EXTREMA IN X   :            1.000000       20.00000
 ** CURVES'S EXTREMA IN Y   :           0.0000000       50.00000
 ** NUMBER OF CURVES :                  2
 ------------------------------------------------------------------------------
 | 10 |  CURVE DEFINE BY Y = F(X)         |
 ------------------------------------------------------------------------------
 | 20 |  CURVE DEFINE BY X = F(Y)         |
 ------------------------------------------------------------------------------
 | 30 |  PARAMETER CURVE DEFINE BY :      |
 |    |     X = F(T) ET Y = G(T)          |
 ------------------------------------------------------------------------------
 | 40 |  NUMBER OF DOTS                   |  100
 ------------------------------------------------------------------------------
 -- OK 0 OR NUMBER OF ITEM TO MODIFY ?
Select key 10, 20 or 30 depending on the form of the function. It is then necessary to enter the bounds of the interval (in X, in Y or in T), then the corresponding expression (or the two expressions for 30). By default, these expressions are evaluated at 100 equidistant points. Key 40 is used to modify this number (it can thus be activated first). After definition, lines 10, 20 or 30 will contain the functional expression(s).
Activate key 19 to request an interpolation of a curve, of those curves present, for which the user enters the number. The following menu is obtained:
-- COMPUTE THE INTERPOLATION COEFFICIENTS --
 ------------------------------------------------------------------------------
 | 10 |  AFFINE REGRESSION        |
 |    |  WITH RATIOS              |           0.0000000
 ------------------------------------------------------------------------------
 | 15 |  LINEAR REGRESSION        |
 |    |  WITH RATIO               |           0.0000000
 ------------------------------------------------------------------------------
 | 95 |  CURVE TO BE ADDED        |   YES
 -----------------------------------------------------------
 -- OK 0 OR NUMBER OF ITEM TO MODIFY ?
Select keys 10, 15, ... depending on the form of the interpolation function to calculate. This function is plotted. By default, the function is added to the list of curves of the current plot. Key 95 is used if this addition is not desired.
Currently, only two types of interpolation are implemented and it is easy to define new cases by modifying subroutine CALREG.
Once a plot is displayed on the screen, a graphics menu appears which allows us to:
Below follows some application examples of TRACXX. The first two examples, figures 4.2 and 4.3 show, for the case of a plot with lines and symbols, the symbols used in hard and soft. Figures 4.4 and 4.5 show line plots of curves: from the first plot, we chose the standard case (linear scales in x and y), a rough grid, one legend per curve and one legend per axis; for the second plot, we chose a logarithmic scale in y with shading. Figure 4.6 shows a plot without the general legend. Figure 4.7 starts with the plot in figure 4.4 and interprets it in the form of a histogram. Figure 4.8 shows the plot of an analytical function defined in parametric form, whereas figure 4.9 shows a set of points (input via the file of figure 4.5), and its linear interpolation.
The plots were obtained by typing the following sequences:
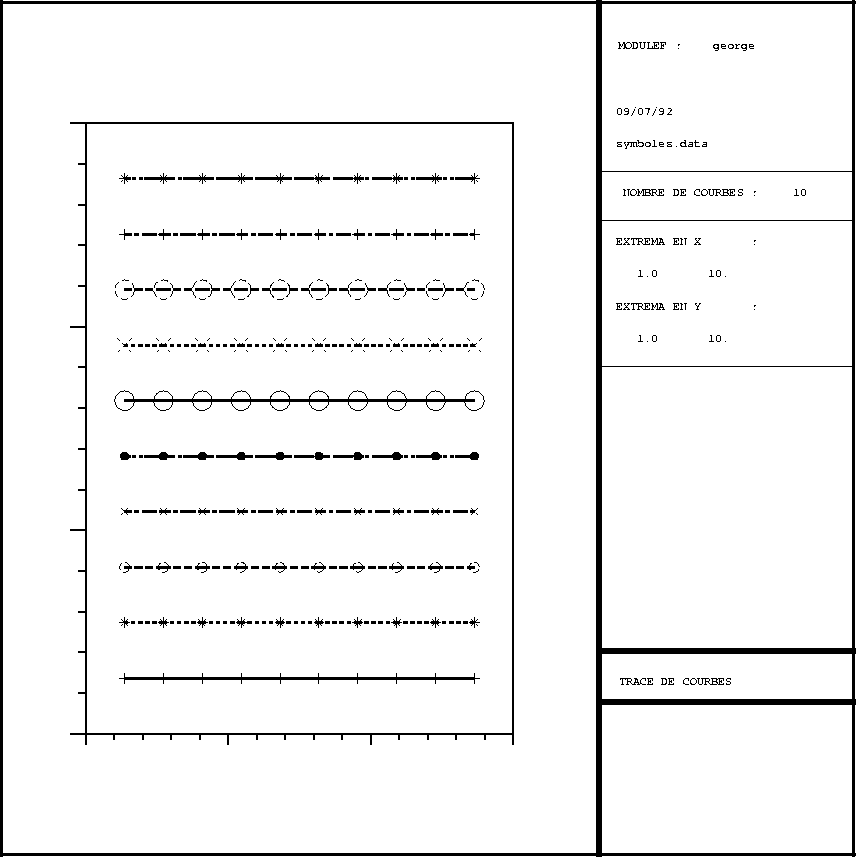
Figure 4.2: Example TRACXX: symbols in hard
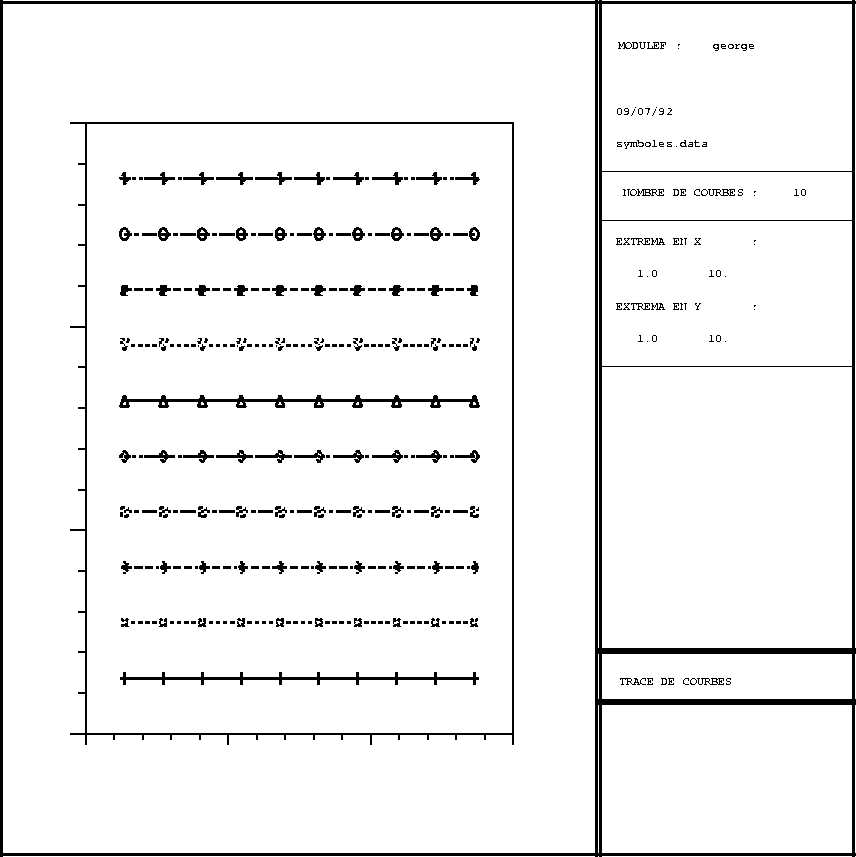
Figure 4.3: Example TRACXX: symbols in soft

Figure 4.4: Example TRACXX: linear scale

Figure 4.5: Example TRACXX: logarithmic scale in Y (shading)
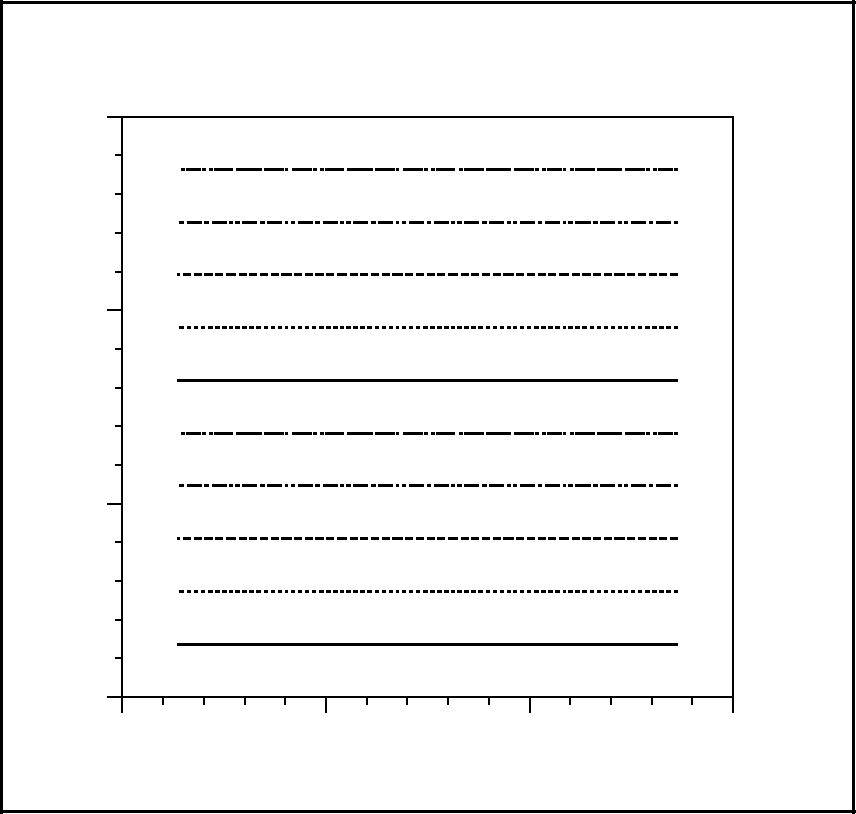
Figure 4.6: Example TRACXX: no general legend
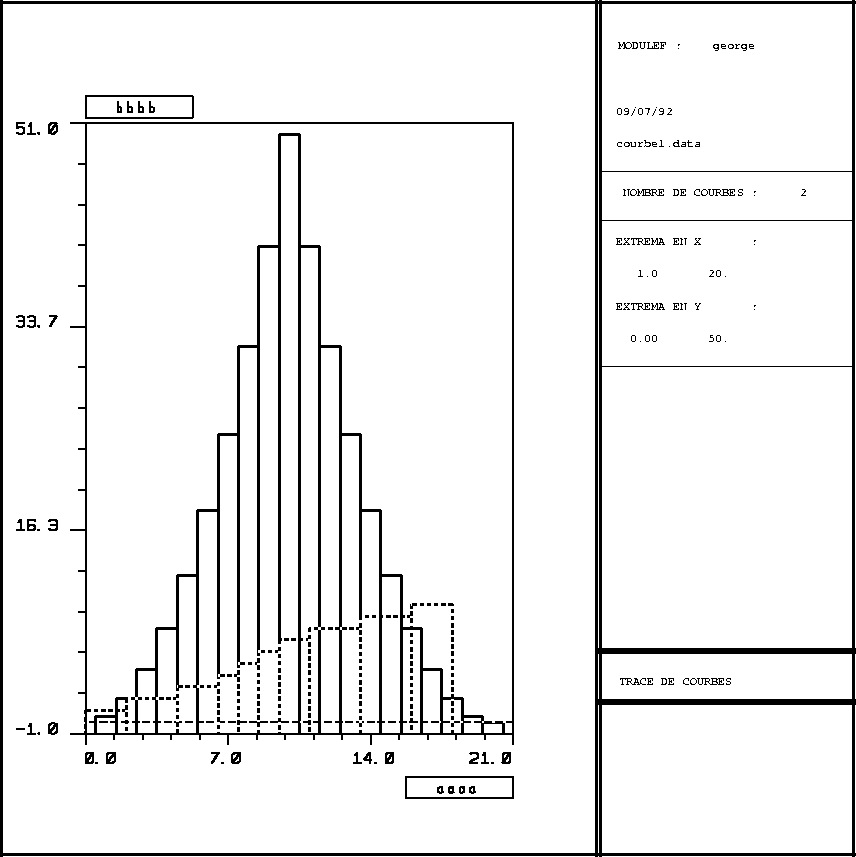
Figure 4.7: Example TRACXX: histograms
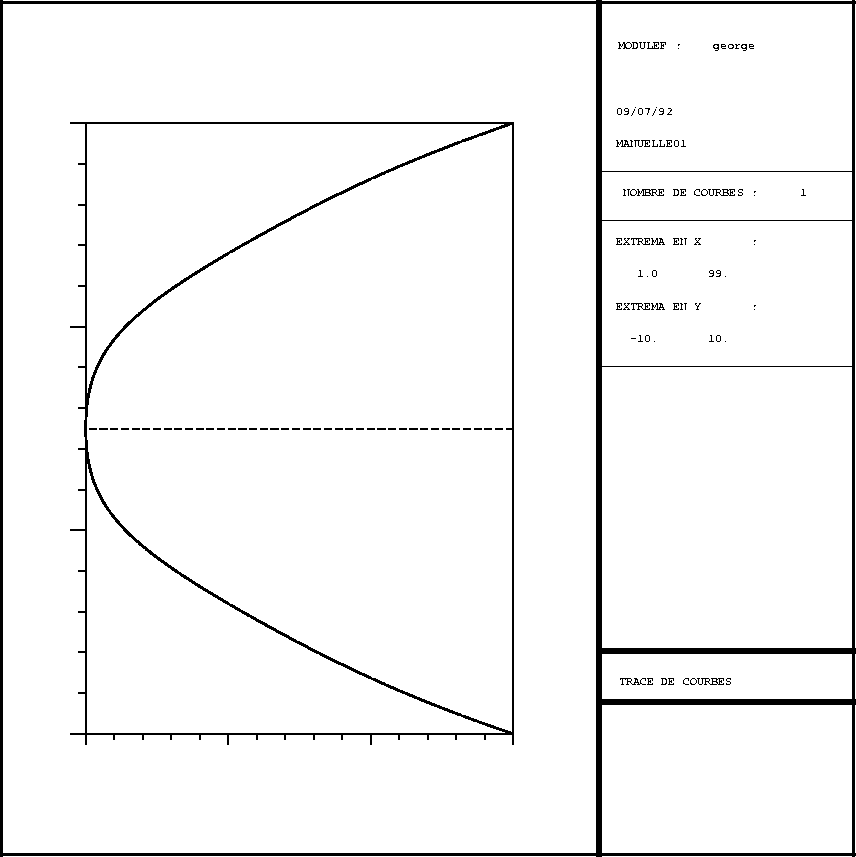
Figure 4.8: Example TRACXX: parametric function
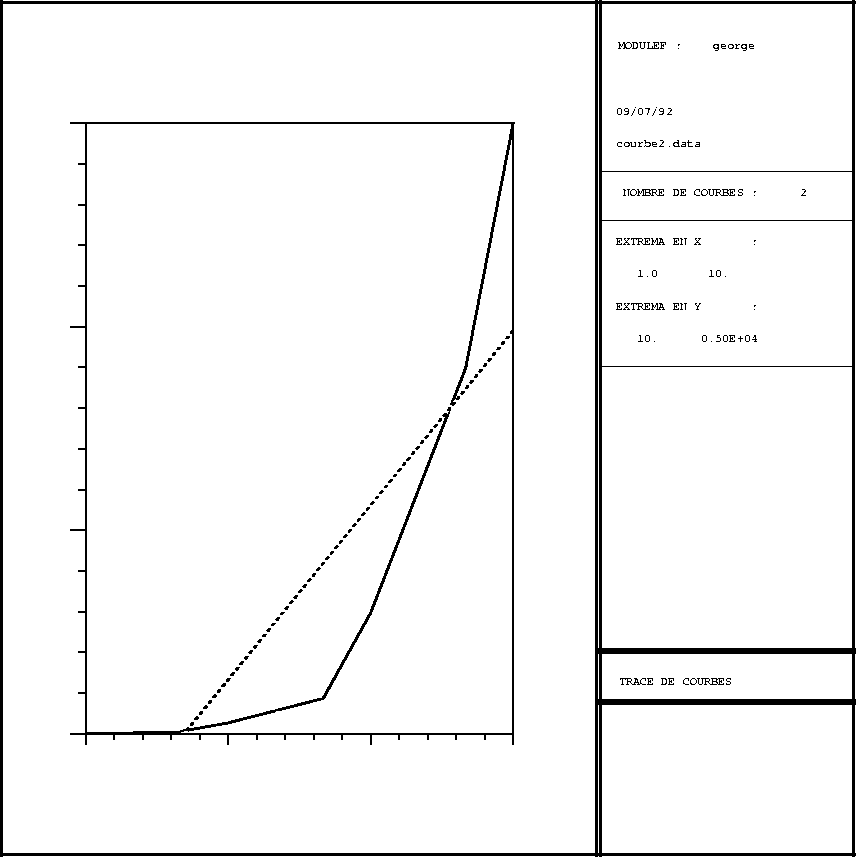
Figure 4.9: Example TRACXX: curve and its interpolation